
 About us
 Payment & Shipping
 News
News
 Cooperation
 Contacts
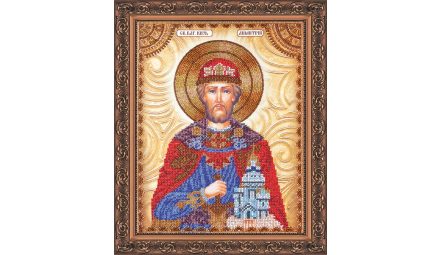
An icon in beads is worked with the same monastic stitch as any other design, but here the order of work matters. Below is where to begin, in what sequence to bead the robes, how to choose a name icon, and how the finished piece is framed.
Where to begin
A bead embroidery kit for an icon contains an art canvas with a full-colour pattern printed on it, Czech Preciosa beads, needles for bead embroidery, and an instruction sheet with a finishing guide. You do not need to keep a chart in front of you on a screen or on paper: the image is printed directly on the canvas and every bead sits on its own mark.
Three things are worth doing before the first stitch.
- Look the canvas over in daylight and work out where the boundary runs between the areas that get beaded and the ones that stay printed.
- Mount the canvas on a hoop or a frame. An icon is mostly flat expanses of robe and background, and any unevenness of tension shows on them.
- Sort the beads into a compartment box and label the colour numbers straight away. The shades in icons sit close to one another: gold, ochre and warm beige are hard to tell apart in a pile on the table.
In Abris Art kits the face and hands stay printed on the canvas — they are not beaded over. The beads cover the robes, the halo, the ornament and the background. Because of this the features stay even and calm no matter how precisely the small shades have been placed, and the piece is within reach of someone embroidering for the first time.
In what order to bead
The general rule is from the most demanding to the simplest. The smallest and most exacting areas are done with a fresh hand, and the large flat expanses are left for the end, when the movement has settled into a rhythm.
- Small details next to the face — hair, edging, collar, fine ornament. This is where the most colour changes occur over the smallest area.
- The robes. Follow the direction of the folds rather than working mechanically in rows: the tonal transitions then read more naturally.
- The halo and gold elements. Coated beads are better laid in continuous areas, so that the sheen stays consistent.
- The background. The largest area and the simplest part; it is comfortable to finish while listening to something.
The stitch itself is the monastic stitch: a single diagonal, like the bottom stitch of a cross. The bead lies at an angle, and there is one main requirement — the angle must be the same throughout the piece. Then the beads reflect light evenly and the beaded area looks solid, without a speckled effect.
- Keep the tension even: the bead should sit snugly, but the canvas under it must not pucker.
- Avoid long carries on the back — move on to the next area of the same colour only if it is close by.
- Look at the work against the light from time to time: a missed bead shows immediately, whereas several rows later it is awkward to add.
- Keep the working thread no longer than 50–60 cm — a long one wears through against the edges of the beads.
How to choose a name icon
A name icon is traditionally chosen after the saint a person is named for. Kits in the catalogue are titled accordingly, so the search usually comes down to typing the name and seeing which subjects exist.
A few practical points worth knowing in advance:
- the everyday and the church form of a name can differ: Oksana — Xenia, Hanna — Anna, Yurii — George, Svitlana — Photina;
- one name may correspond to several saints, and the subjects differ accordingly;
- if there is no exact match, families handle it differently — some take a similar-sounding name, some ask their priest;
- an icon is often embroidered for a christening, a name day or a wedding, and it then makes sense to check in advance which name was recorded at baptism — it does not always match the one in the passport.
This is a personal decision and not one to be prompted from outside. The practical part that is up to you is finding out the name in good time and allowing for the work: a large icon is not embroidered in one evening.
Large name icons and mini icons: the difference
The difference is not only in the size of the canvas.
| Compared | Large name icons | Name mini icons |
|---|---|---|
| Beaded area | Large, with a generous background and ornament | Small, with a compact background |
| Detail of the robes | Folds, ornament, several shades of one colour | Generalised, fewer transitions |
| Working time | A longer project, usually carried over several weeks | Shorter, often someone's first icon |
| Finishing | A moulding frame, sometimes a shrine case | A small frame, a stand, a shelf |
| Typical role | A household icon on the wall | A gift, a travel format |
Exact sizes, the number of bead colours and the difficulty level are given on each kit's page — both in the section of large name icons and in the section of name mini icons. If this is your first icon, starting with a mini is the calmer option: the technique is the same and the result comes sooner.
How the finished icon is framed and where it is placed
A finished canvas is not washed. Dust is removed from the beads with a soft dry brush or a stream of cool air from a hairdryer held at a distance. If finger marks are left on the canvas, they are lifted carefully with a barely damp cloth over the unbeaded areas, without touching the print.
Then come three steps.
- Stretching. The canvas is stretched over stiff card or a wooden frame, evenly, working from opposite sides in turn. A skew introduced at this stage cannot be corrected later.
- The frame. Bead work calls for a moulding with depth. If the piece is covered with glass, a spacer is needed: glass pressed flat flattens the beads and kills the sheen.
- The shrine case. The traditional way of finishing an icon is a wooden case with a glazed door, made to order for the size of the finished piece.
As for placement: an icon is usually stood or hung where direct sunlight does not fall on it and where there is no source of damp or heat nearby — not above a radiator, not over a kitchen stove, not in a bathroom. These are simple conservation considerations: sunlight fades threads and bead coatings, and swings in humidity warp card and stretcher bars. Everything else is a matter of family tradition, and it is settled at home rather than in an instruction sheet.
Frequently asked questions
Why is the face not beaded?
Because in Abris Art kits the face and hands stay printed on the canvas. Faces and exposed parts of the hands are printed artistically, with subtle transitions that beads cannot reproduce: one bead is one solid colour. The beads cover the robes, the halo, the ornament and the background.
Which area should I start an icon from?
From the small details next to the face, leaving the background until last. Small areas with frequent colour changes need more attention and are easier to do at the start, while the eye is fresh. Large flat areas of background call for an even rhythm rather than concentration.
Which stitch are beaded icons worked in?
The monastic stitch — a single diagonal, like the bottom stitch of a cross. All the beads lie at the same angle, so the beaded area looks even and reflects light consistently. Mix the directions and the work starts to look speckled under side lighting.
What if the name is not in the list of name icons?
Check the church form of the name: that is how the kits are titled. Oksana appears in the church calendar as Xenia, Svitlana as Photina, Yurii as George. If there is still no match, that becomes a family decision rather than a catalogue question.
Can a beaded icon be framed under glass?
Yes, but only with a gap between the glass and the canvas. Glass pressed flat squashes the beads, which lose their depth and sheen, and the thread stretches under constant pressure. A spacer profile costs little at a framing workshop and the difference is visible straight away.
How long does an icon take to embroider?
It depends on the beaded area: a mini icon takes a few evenings, a large one several weeks of an hour or two at a time. You can estimate it more precisely like this: count how many beads you place in half an hour and divide the total bead count given in the kit description by that figure.