
 About us
 Payment & Shipping
 News
News
 Cooperation
 Contacts
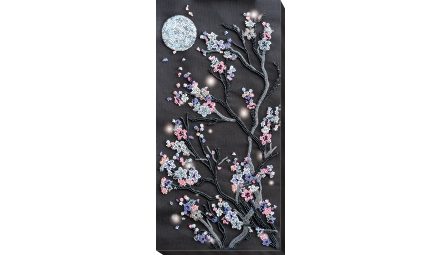
A first kit is intimidating not because of the needle but because of the small decisions that all arrive at once: what thread to use, which corner to start from, how to keep the canvas from warping. Below is the sequence from an unopened box to your first even rows, with the reasoning behind each step.
What is in the kit and what you will need to buy
A bead embroidery kit on art canvas has four components: the canvas with a full-colour chart printed on it, Czech Preciosa beads in the required number of colours, beading needles, and an instruction sheet with the framing chart. The chart is printed directly on the canvas, so you never have to check each stitch against a paper sheet or a screen — you see the colour right under the needle.
Thread, a hoop, scissors and a lamp are not included: thread is chosen to match the background and your own hand, the hoop depends on the size of the canvas, and everyone's lighting is different. Before you start, get ready:
- Thread — thin, strong, matching the canvas or slightly darker than the beads. Bonded polyester or a dedicated beading thread works well; ordinary sewing cotton wears through against glass faster than you will finish the piece.
- Scissors with thin sharp tips, so you can cut the thread flush with the canvas without touching the beads.
- A flat dish, tray or a few lids for the beads. A cloth napkin on the bottom keeps them from rolling away.
- A hoop, frame or stand — optional. A small piece is comfortably stitched in the hand.
Thread, scissors, a tray and a hoop are all chosen separately — they are in the accessories and tools section.
Your workspace and lighting
Bead embroidery means many hours at arm's length, so the setup matters more than it seems. The table should be high enough for your elbows to rest on it without lifting your shoulders. Keep your back against the chair and bring the canvas closer to you instead of leaning towards it — that lean is what produces a sore neck by the third evening.
Light should come in two layers: general room light plus a desk lamp. Put a neutral-white lamp (around 4000–5000 K) to the side — on the left for a right-handed stitcher, on the right for a left-handed one — so the hand holding the needle does not cast a shadow on the working area. Daylight from a window is still the best for checking shades: close bead colours merge under warm evening light.
Keep a session to 40–60 minutes, then spend a few minutes looking out of the window into the distance. This is not about discipline but about eye focus: after two hours without a break accuracy drops and skipped cells appear.
Unpacking: what to do before the first stitch
Do not pour the beads out straight away. First check the packets against the list in the instruction: every colour has its own number, and it is that number you will be looking for on the chart. Then:
- Move the beads into containers or lids and label each one with its colour number. Keep the empty packets until the end — the number is on them.
- Do not mix two similar shades in one dish. Separating grey from grey-blue afterwards is not realistic.
- Spread the canvas out and let it rest for a few hours. Fold marks from packing relax on their own.
- Hold the canvas against the light: this shows clearly where the chart is dense and where the print stays uncovered. On art canvas the beads do not cover the whole surface — part of the image is carried by the print, and that is by design.
Thread and starting without a knot
A working thread is 50–70 cm. Longer tangles and abrades against the glass of the beads; shorter forces you to re-anchor every five minutes. Put the needle on with the eye towards you; if the thread will not go through, cut the end at a sharp angle and flatten it between your fingers.
A knot on the back is a bump that shows through the glass when the piece is framed, and it is a weak point: knots come undone. There are better ways.
The loop start
Fold the thread double and pass the needle eye through the loop. Bring the needle from the back to the front where the first bead will sit, leaving the loop on the back. Pass the needle through that loop and pull tight — the thread holds itself, with no knot. This works only with doubled thread.
Two micro-stitches
For a single thread: leave a 5–7 cm tail and make two very small stitches side by side, inside the area you are about to cover with beads. Later you tuck the tail under the first stitches on the back. It holds firmly and stays invisible under the beading.
Which corner to start from and how to hold the tension
Start in the top left corner (top right if you are left-handed) and work downwards. That way your hand rests on the unstitched part and the work stays clean. If the subject is symmetrical — an icon with a clear axis, for instance — it is easier to start from the central detail, so that a one-row error does not travel across the whole composition. Such designs are in the icons and amulets section.
Rows run horizontally: left to right, then the next one back. Mentally divide the canvas into squares of roughly 5×5 cm and finish a square before moving on — it makes returning after a break much easier.
Tension is easy to check: the bead sits snugly, but the canvas underneath is not pulled into a pucker. Run a finger along a finished row and the beads should rock very slightly — that is correct. Overtightened thread bows the canvas into a shallow boat; undertightened thread leaves beads lying on their side.
Every ten beads, glance at the slant: they must all lean the same way. A single bead turned against the direction catches the light differently and is visible from across the room.
The first rows, step by step
- Anchor the thread with one of the two methods at the point where the first row begins.
- Bring the needle to the front at the bottom left corner of a chart cell.
- Pick up one bead of the required colour.
- Take the needle down into the top right corner of the same cell — the bead sits on the diagonal.
- On the back, bring the needle up at the bottom left corner of the next cell and repeat.
- After ten beads check the slant and the tension, then carry on.
- When about 10 cm of thread is left, anchor it with two small stitches under the beaded area and cut it flush.
This is the monastery stitch — a half-cross worked with beads, and the stitch used for most charts printed on art canvas. One bead per diagonal stitch, one slant across the whole piece.
Long breaks in the work
A 30×40 cm piece takes dozens of evenings, so breaks are normal. To come back without losses:
- Take the needle out of the canvas. A needle left in place for a month can leave a mark that never washes out.
- If the break will be longer than a week, anchor the thread and cut it. A loose end will tangle or pull out in that time.
- Roll the canvas face outwards rather than folding it in four. Creases along folds show up once the piece is stretched over a frame.
- Cover the work with a cloth. Dust between beads is hard to remove, and six months of direct sun visibly changes the finish of some colours.
- Keep the beads in labelled containers, not in a bowl marked "I will sort this later".
- Photograph the spot where you stopped and note the colour number you were using. Three months on, that saves you an evening.
Three mistakes almost everyone makes
- Starting with a large subject. A 40×50 cm piece is over 30,000 beads, and a first attempt at that size often stays unfinished. It is wiser to take something from the mini kits and go all the way through to framing.
- Picking up two or three beads per stitch to go faster. The row immediately starts to wander and the density becomes uneven.
- Working with too long a thread. It twists, frays against the edges of the bead holes and breaks in the middle of a row.
Frequently asked questions
Is a hoop essential for bead embroidery on canvas?
No, it is not. Art canvas is denser than aida and holds its shape on its own, so small pieces are stitched in the hand. A hoop or frame becomes genuinely useful from about 30×40 cm upwards: even tension removes waves and makes density easier to control. The one rule is to take the work off the hoop after each session so the ring does not leave a mark.
What thread should I use if the kit has none?
Thin, strong and abrasion-resistant: bonded polyester, a lavsan thread, or a dedicated beading thread. Choose it to match the canvas or half a tone darker than the beads, so it does not glint between them. Cotton floss is a poor choice for beads — it fluffs up against the glass edges of the holes.
How many beads should go on one stitch?
One. In the monastery stitch a bead corresponds to exactly one chart cell, and that is what gives an even surface. Several beads per stitch belong to the arch stitch, which is not used on cell-based charts.
What if I run out of one colour?
First go through the leftovers: a share of the beads usually settles at the bottom of the packet and in the folds of the tray. If you are genuinely a few dozen short, sourcing the same Preciosa number is easier than it sounds, because it is a calibrated production bead. Finishing with a similar shade from another batch is only sensible on an area that is never seen as a whole, since the difference in finish shows most over a large surface.
Can a finished piece be washed?
Better not. Remove dust with a soft dry brush or a stream of cold air from a hairdryer; blot marks on unbeaded areas with a barely damp cloth and dry them at once. Soaking damages both the print and the bead finish.
How long will a first piece take?
Count in beads: a beginner places roughly 250–400 beads an hour, and with practice the pace rises to 500–700. A 3,000-bead design is 8–12 hours, that is a week of quiet evenings. The bead count is listed in the specifications of every kit in the bead embroidery kits catalogue, so you can estimate the time before you buy.