
 About us
 Payment & Shipping
 News
News
 Cooperation
 Contacts
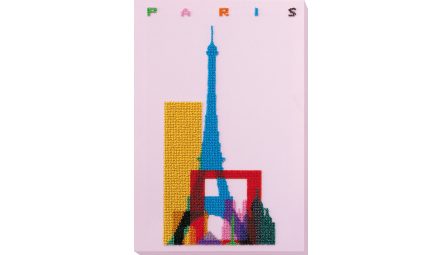
Stretching a finished piece over stretcher bars is where framing an embroidered picture begins. You can do it by hand, in an hour and a half, without a workshop. Below is the order of operations and the mistakes that later make a finished piece ripple.
When you need stretcher bars and when you do not
Stretcher bars keep the canvas flat and stop it sagging inside the frame. You will need them for almost anything larger than your palm: a canvas covered in beads weighs noticeably more than a bare one, and without a rigid support it eventually droops under its own weight. Small formats are the exception. Magnets, keyrings and pennants have nothing to stretch over — those kits already include an acrylic base and magnetic tape, and the finished piece is mounted straight onto them.
Instead of wooden bars, people sometimes use thick cardboard or foam board. For a piece up to 20×25 cm that is acceptable; for anything larger it is not, because cardboard bows into an arc over time and the curve shows diagonally even under glass. Wooden bars with a batten section of 20 mm or more hold their shape for years.
What to prepare
- Stretcher bars 2–4 mm smaller than the embroidered area on each side — the work should wrap slightly over the edge rather than butt against it.
- A staple gun with 6–8 mm staples. Longer staples go straight through the batten.
- Dressmaking pins or drawing pins, to lock in the tension before you commit with staples.
- A ruler, a soft pencil, scissors.
- A flat, hard surface. A table, not a sofa and not your lap.
The staple gun is not essential: small nails with wide heads do the same job, just more slowly. The one thing you cannot substitute here is a flat surface.
Step 1. Prepare the canvas
Start with the back. Knots, long floats and thread tails need to be trimmed or tucked under the stitching: under tension every knot creates a bump that shows through on the front. If the canvas has been in a hoop for a long time and the rim has left marks, leave the piece lying flat for a day or two — some of the creases will relax on their own.
Never iron bead embroidery. Not from the front, not from the back: heat damages the bead coating, and the pressure of the iron cracks individual beads and flattens the stitching. Creases on the margins that will end up on the reverse do not matter — nobody will see them anyway.
Step 2. Mark the centres
These are the five most important minutes of the whole job. Find the midpoint of each side of the stretcher frame and mark all four with a pencil. Then find the midpoint of each side of the embroidered area — the image itself, not the canvas — and mark those on the margins.
Now lay the work face down, put the stretcher frame on top, and line up mark to mark. If the design is printed slightly off-centre on the canvas (and that happens), go by the design, not by the edge of the fabric: in a frame people look at the picture, not at the cut of the cloth.
Step 3. The stapling order
The order matters more than the force. You do not work around the perimeter — you work crosswise, from the centres out to the corners:
- One staple in the centre of the top side.
- One in the centre of the bottom side, pulling towards you.
- Centre of the left side, then centre of the right.
- Check that the design sits square. With only four staples in, it is still easy to redo.
- Now work outwards from each central staple towards the corners, alternating sides: two staples top, two bottom, two left, two right.
- Leave the corners until last — stop 3–4 cm short of each one.
Space the staples 3–5 cm apart on small pieces, 5–7 cm on large ones. Closer than that is counterproductive: too many staples perforate the edge of the canvas and it tears.
How to keep the tension even
The tension should stop the canvas sagging without deforming it. A simple test: press a finger into the middle of the piece — it should give slightly, like a drum skin, and spring straight back. If your finger sinks in, it is too loose. If the canvas does not yield at all and the design looks visibly stretched, you have overdone it.
Pull perpendicular to the side, never on the diagonal. The most common mistake is pulling "towards you and a bit sideways" because that is what the hand naturally does: ten staples later you have a few millimetres of skew, and the design has turned into a rhombus.
A useful habit: before firing a staple, hold the tension with a pin and look at the piece from arm's length. A staple is a final decision; a pin is not.
Corners
The corner is where the surplus fabric gathers, and the goal is to keep it from building up. Fold it like an envelope: first turn the diagonal of the corner inwards, then lay one side over the other so that the fold runs cleanly along the edge of the batten.
Trim the excess afterwards, leaving 1–1.5 cm. If a corner comes out thick, the piece will not sit square in the frame — corners are the usual reason a picture refuses to drop into the rebate. Checking the thickness is easy: put the stretched piece face up on the table and press each of the four corners in turn. If it rocks, take it apart and refold.
What to do with the canvas margins
The margins are the free fabric around the design. Proper stretching needs at least 3–4 cm on each side; with less there is simply nothing for your fingers and the staple gun to grip.
If the margins are narrow, you have two options. The first is to use smaller stretcher bars so that part of the background wraps onto the edge. The second, and more reliable, is to extend the margins: machine-stitch strips of firm cotton 6–8 cm wide to the edges of the canvas. Make sure the seam runs exactly along the line you intend to stretch to, so the tension follows the seam rather than the edge of the design.
Do not trim surplus margins before stretching. Stretch first, check, and only then remove the excess — you cannot sew back what you have cut off.
Mistakes that make a piece ripple
- Starting at the corners. The middle is left free and sags, and there is nothing left to pull it straight with.
- Working around the perimeter. Going round the edge always drives the fabric into the last side, and that is where the wave forms.
- Uneven tension on opposite sides. The piece becomes a trapezoid. You will not notice at once — you will notice in the frame.
- Pulling on the diagonal. The bead rows stop running parallel to the edge, and the eye catches it.
- Bars that are too thin. A 10–15 mm batten on a 40×50 cm piece bows inwards under the tension.
- Ironing before stretching. Damaged beads cannot be replaced, and the canvas does not come out any flatter.
- Stretching a damp canvas. As it dries, the fabric shrinks unevenly and drags the stitching with it.
If a piece has already gone wavy, take it off and stretch it again — staples pull out with pliers and the canvas is none the worse for it. Leaving it as it is, is worse: under glass a ripple casts a shadow and stands out far more than it did on the table.
Frequently asked questions
Are stretcher bars included in the kit?
No. A bead embroidery kit on art canvas contains the canvas itself with the full-colour design printed on it, Czech Preciosa beads, bead embroidery needles, and an instruction sheet with a framing scheme. Stretcher bars and the frame are chosen separately once the piece is finished.
Can I stretch the work in a hoop and leave it like that?
You can, if that is the intention — a round piece in a wooden hoop looks finished. But the hoop you stitched in is not the one to use: the screw loosens over time and the ring leaves a mark on the fabric. Use a separate hoop for display, preferably wooden rather than plastic.
How far in from the edge of the stitching should the bars sit?
The stretcher frame should be 2–4 mm smaller than the embroidered area on each side. That way the outermost bead rows wrap slightly over the edge and the join between design and canvas is invisible. If the bars are larger than the design, a blank border of canvas will show all round — sometimes that looks good, but it should be a deliberate choice, not an accident.
What can I use instead of a staple gun?
Small wide-headed nails, or ordinary drawing pins with the edges glued down afterwards. Another workable option for smaller pieces is lacing the back: pull the opposite margins together crosswise with strong thread, like a shoelace. It is slower, but the tension is easy to adjust later.
The piece is stretched, but the beads still lie in a wave. Why?
Usually the cause is not the tension but the stitching: if the thread was pulled too tight while you worked, the canvas is drawn in locally, and stretching does not undo that. The second cause is stitching in the hand without a hoop. In that case the only remedy is to ease the tension off — an over-stretched background makes the wave in the beadwork more obvious, not less.
Can I stretch an unfinished piece and keep stitching on it?
Yes, and many people do exactly that on large formats: canvas on bars does not crease and stays flat. Just bear in mind you will be stapling twice — when the piece is done you take it off and re-stretch it properly, because the tension inevitably slackens along the way.
The finished piece then goes into a moulding, and that is the stage where you decide whether it gets glass. The kits all this starts with are in bead embroidery kits and large kits, and hoops and small tools are in accessories and tools.