
 About us
 Payment & Shipping
 News
News
 Cooperation
 Contacts
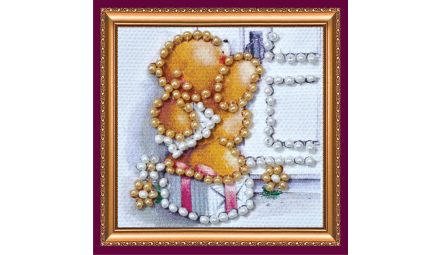
The question "from what age can a child do bead embroidery" is really two questions: when is it safe, and when will it hold a child's interest for longer than the first half hour. Below are age guidelines, which formats to start with, how to break the work into short sessions, and what turns a child's enthusiasm into a chore.
From what age it is safe
The main limit is not the child's skill but the small parts. Beads, needles, fittings, magnetic tape — all of them are things a small child puts in their mouth. Kits with small parts must not be left unattended with children under three: this is not box-copy formality but the reason such products carry an age restriction. A child under three should not have access to beads even with an adult present who has turned away for a minute.
Beyond that it becomes a question of capability rather than safety. Bead embroidery requires three things at once: precise fingers, attention held on a small object, and the patience to repeat the same action. Those skills do not mature at the same time.
| Age | What actually works | Format | Session length |
|---|---|---|---|
| under 3 | nothing; no access to small parts | — | — |
| 3–5 | looking at and sorting beads under supervision | no needle | 10 min |
| 6–7 | first rows, an adult threads the needle | magnet, card | 15–20 min |
| 8–9 | a small piece from start to finish | magnet, keyring, mini kit | 20–30 min |
| 10–12 | working independently with an adult nearby | mini kit, small picture | 30–40 min |
| 13 and over | full kits with no limits on format | any | as an adult |
The figures are a guide, not a standard. A seven-year-old who has spent a year building models with tiny parts will manage better than a ten-year-old picking up a needle for the first time.
Why small parts need supervision
There are three risks here, and all of them are domestic.
- Spilt beads. A packet tips over in a second and the beads end up under the table, in the carpet, in the cat's bowl. If there is a younger child or a pet in the house, this is the main risk, not the needle. Work on a tray with a raised edge or a shallow box lined with a light-coloured cloth.
- The needle. What loses it is not the child but the habit of putting it down "for a second" on the sofa. Make it a rule to count needles at the start and end of a session and to keep them in a needle case, not in the arm of a chair.
- A workspace that never gets cleared. A kit left out until tomorrow means both spilt beads and a lost needle. Putting everything back in the box after each session takes two minutes.
Supervision at this age does not mean sitting alongside and correcting; it means being in the same room, threading the needle on request, and making sure small parts do not travel round the flat.
Which formats suit children who are new to it
There is one main criterion: the work has to finish before the interest does. Large canvases, icons and fully beaded designs are therefore wrong for a first attempt, even if the child confidently asks for exactly that.
- Magnets. The best first format: a result in one or two evenings and a finished object visible on the fridge straight away. Assembly is simple and can be done together.
- Cards. These work when there is an occasion — a grandmother's birthday, something at school. The goal is concrete rather than abstract, and for a child that matters more than the design itself.
- Mini kits. The next step after a magnet: the same technique, but a larger area and a real need to keep a row even.
- Keyrings. Good for teenagers — the object is carried around and keeps reminding them of what they made.
What to avoid at first: large canvases, icons, fully beaded designs and microbeads. Microbeads No. 13 are small even for an adult eye and need a fine needle and good light — not the material on which to learn to hold a needle.
If a child is not ready for a needle but wants to make something with their hands, there are neighbouring options with no sharp tools: craft kits and paint by numbers. They train the same staying power, and the move to beadwork comes more easily afterwards.
How to break the work into short sessions
Adult logic — sit down and get it done — does not apply here. Children tire not from difficulty but from monotony, and the tiredness arrives before they notice it.
- Keep to the session length in the table above and stop before irritation appears, not after.
- Stop at an interesting point rather than "when the row is finished". An unfinished fragment pulls a child back; a finished one does not.
- Break the design into visible chunks: the flower today, the leaf tomorrow, the corner of the background the day after. "Finish the kit" is too large a goal; "finish the petal" is reachable.
- Give the eyes a break every 20 minutes — a few seconds looking out of the window. Fine work tires eyesight faster than it seems.
- Set up the place: light coming from the side of the working hand, a table at elbow height, a chair that removes the need to stretch. Half of "the child won't sit still" is in fact an uncomfortable chair.
How not to put a child off
Embroidery is most often abandoned not because it is hard but because of how adults react. A few things worth not doing.
- Do not redo the work. Unpicking someone's stitching without being asked is the fastest way to say it was done badly. Uneven rows in a first piece are normal, and the child will see the difference in the second one anyway.
- Do not set a deadline. "It has to be ready by Saturday" turns a hobby into an obligation. If the gift is urgent, choose a format that certainly fits the time rather than forcing the pace.
- Let them choose the design. A child finishes what they like, not what you think looks good.
- Let them stop and come back. A kit that has sat untouched for a month is not a failure. Work someone was made to return to almost always is.
- Praise the process, not the evenness of the rows. "You sat with it a long time today and didn't give up" works better than "how neat it came out", because the second is not something the child controls.
The formats that are easiest to start with are gathered in the bead embroidery magnet kits, mini kits and embroidery cards sections.
Frequently asked questions
From what age can a child do bead embroidery?
From roughly 6–7 with adult supervision, and from 10–12 independently. Under three there is no access to kits at all; between 3 and 5 a child can at most look at and sort beads beside an adult.
Can I give a kit to a child under three?
No. Beads, needles and fittings are small parts and must not be left unattended with children under three, because they end up in the mouth. At that age the kit belongs somewhere the child cannot reach.
Which kit should I buy for an eight-year-old?
A magnet or a card. That is 3–10 hours of work, meaning several short sessions, and the result is a finished object with no framing needed. A large canvas at this age is almost always left unfinished.
How long can a child work at a stretch?
15–20 minutes at 6–7, 20–30 at 8–9 and 30–40 at 10–12. Longer is possible, but the child will sit down reluctantly next time — better to stop before tiredness arrives.
Is a beading needle safe in a child's hands?
A beading needle is thin and sharp, so between 6 and 9 an adult should thread it and it should live in a needle case. The rule of counting needles before and after a session removes almost all the everyday risk.
My child abandoned the work halfway — what should I do?
Put the kit away and do not mention it. If they have not come back within a few weeks, choose a format half the size next time: the reason is almost always that the work turned out to be longer than the interest, not that the technique disappointed.