
 About us
 Payment & Shipping
 News
News
 Cooperation
 Contacts
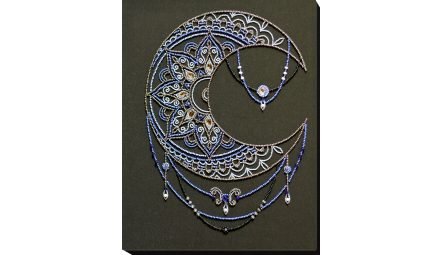
Three things go wrong most often mid-project: one bead colour runs out, the thread breaks in the middle of a row, or the canvas gets snagged or torn. None of them makes the kit unusable. Below is what to do in each case and how to reduce the risk in advance.
Why beads can run short
Beads are packed by weight, and usually a little is left over at the end. They can still run short, though, and the reasons are almost always the same.
- Rejects. Some beads have to be set aside: those with a hole that is too narrow or blocked, with a chipped edge, or noticeably larger or smaller than the rest. Over a large area of one colour these add up.
- Spills. The most ordinary reason of all. Beads that roll under the wardrobe do not come back.
- A different stitch. Consumption is calculated for the monastic stitch. Working in a row stitch or with a double pass changes the number of beads over the same area.
- Reworking. Every unpicked area means beads that are partly lost: some crack, some go missing.
- Changing a colour. If you decide to bead over an area meant to stay printed, or swap one shade for another, the calculation goes off immediately.
How to lay out beads economically
Half the losses come down to how the table is organised, not to technique.
- Do not tip out the whole packet. Pour small portions into a compartment of the box and keep the rest closed: spilling 20 beads and spilling five grams are different events.
- Work over light-coloured fabric or in a shallow tray with a rim. Beads roll off a smooth table; off fabric they do not.
- Label the compartments with colour numbers straight away, before the first stitch. Sorting mixed shades afterwards takes longer than the embroidery itself.
- Start with the colour there is least of. That way you find a shortage at the beginning of the work rather than in the last row.
- Do not throw the odd-looking beads away at once — put them in a separate compartment. Some will do for areas where a bead is surrounded by others and its shape does not matter.
- Keep the leftovers after each project. A few kits later you will have your own reserve of the commonest shades.
What to do when the thread breaks mid-row
Do not pull, and do not try to tie the ends together — a knot in the middle of the canvas makes a bump that will not hide under the beads and works loose in time.
- Carefully take the needle out of the canvas and see exactly where the thread has given way. If the last few beads are already held loosely, take them off — they will fall out anyway.
- Secure the tail left on the back: run it under four or five finished stitches of the same colour and trim it, leaving 2–3 mm.
- Secure the new thread the same way — under finished stitches on the back, two or three beads before the break.
- Bring the needle up on the front through exactly the hole the next stitch should start from, and carry on with the row.
To make this happen less often: keep the working thread no longer than 50–60 cm, watch that it does not twist, and never tighten a stitch with a jerk — it is the sharp movement that wears the thread against the sharp edge of a bead hole. If the thread keeps breaking in the same place, look closely at the beads in that row: sometimes a single chipped bead is acting as a blade. Replace it. Stronger threads for bead embroidery and spare needles are sold separately.
How to unpick a mistake
The main rule: unpick from the back with a blade, rather than pulling the needle back through the fabric. Reversing the needle stretches the holes in the canvas and drags out the nap.
- Lay the work face down on a hard flat surface with good light on it.
- Find the stitches of the wrong area on the back. With a seam ripper, cut every third or fourth stitch rather than all of them — the thread then comes away by itself.
- Turn the work over and lift the beads off with tweezers, one at a time, without tugging. Put the cracked ones aside.
- Clear the thread ends off the back with a soft brush or sticky tape, pressing it down and lifting it straight off. Do not rub.
- Ease the canvas out with your fingers along the diagonals so the holes close up. If the area was large, leave the work under a light weight for a few hours.
A single bead of the wrong colour is sometimes easier to cover than to unpick — but only if it sits deep inside a solid area where the eye does not go. If the mistake is on a colour boundary or somewhere prominent, unpick it: a covered bead still shows in raking light.
What to do with a damaged canvas
Holes and snags fall into three cases, and each has its own solution.
| Damage | Where | What to do |
|---|---|---|
| Snag, threads pushed apart | Anywhere | Ease them back with a fingernail or the blunt end of a needle, damp with a finger and leave to dry |
| Hole up to 2–3 mm | In an area that gets beaded | Back it with fusible interfacing through a cloth, then bead over it |
| Hole or cut | In the margin left for framing | Nothing — that part disappears under the stretcher |
| Damaged print | In an area to be beaded | Go by the neighbouring marks; the colour can be read from the row |
| Tear or damaged print on the face | In an unbeaded area | Do not repair it yourself — write to customer support |
Do not press an iron directly onto the print and do not hold the canvas under a running tap. If a crease has to be removed, lay the work face down on a soft towel and go over the back through a cloth, without steam, avoiding the beaded areas.
How to ask for replacement materials
If the beads really have run out or the damage is serious, write to Abris Art customer support and give the article number from the packaging and the colour number. The article number is the letter-and-digit code on the pack. Together with the colour number, those two values are enough to identify exactly what is needed.
To save an exchange of letters, attach at once:
- a photo of the packaging showing the article number;
- a photo of the area that ran short, or of the damage;
- a rough estimate of how many beads are left to place.
Do not throw the packaging and the leftover beads away before the work is finished: without the article number the colour has to be identified from a photograph, which is slower and less precise.
Frequently asked questions
What should I do if one bead colour runs out?
Write to Abris Art customer support and give the article number from the packaging and the colour number. Until then, do not unpick what is already done and do not substitute a similar shade from your own supplies: beads from different batches can differ in tone, and the boundary between the areas will show in the light.
Can I substitute a bead of a slightly different shade?
One or two inside a solid area, yes — nobody will see the difference. A whole section, no: batches differ in the intensity of the coating, and over a large area the transition reads even in ordinary room light. For anything more than a few dozen beads it is better to wait for the replacement.
How do I secure the thread if it breaks mid-row?
Run the tail under four or five finished stitches of the same colour on the back and trim it, leaving 2–3 mm. Start the new thread the same way, two or three beads before the break, and bring the needle up in the hole where the next stitch should begin. No knot is made in the middle of the canvas.
What should I unpick a mistake with so as not to damage the canvas?
A seam ripper, from the back, cutting every third or fourth stitch. Do not pull the needle back through the fabric — that stretches the holes. Lift the beads off with tweezers one at a time, and clear the thread ends with sticky tape, pressing and lifting rather than rubbing them across the canvas.
What if a small hole appears in the canvas?
If it is in an area that gets beaded and no larger than 2–3 mm, back it with fusible interfacing and bead over it; the beads will cover it completely. If the hole is in the margin left for framing, nothing needs doing. If the damage is in a part that stays unbeaded, write to customer support and quote the article number.
How do I reduce the risk of running short of beads?
Pour beads out in small portions, work over light fabric or a tray with a rim, and start with the colour there is least of. A shortage then shows up early, when there is still time to deal with it, rather than in the last row. Leftovers from earlier bead embroidery kits are worth keeping — over time they cover most small needs.