
 About us
 Payment & Shipping
 News
News
 Cooperation
 Contacts
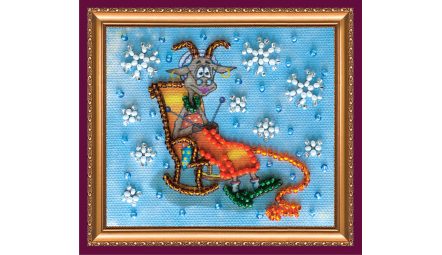
A magnet, a keyring and an embroidered card are formats you do not have to take anywhere once the stitching is done. You assemble the finished piece at home, which is exactly why people choose them for a first project or for a gift that has to be ready by a particular date. Below is how they differ from pictures, how to assemble each one, and how much time to allow.
How these formats differ from pictures
The difference is not in the difficulty of the embroidery but in what happens afterwards. An embroidered picture is not yet a finished object: it has to be stretched onto a backing and framed, and that means extra money, extra time and a trip to a workshop. A magnet, a keyring and a card become a finished item straight away, from what is already in the kit or in your drawer.
The second difference is size. These formats are small, so the beaded area is modest and you can see a result after the first evening. The third is risk. Abandoning a large canvas a third of the way in feels like a waste; a small format almost always gets finished, and that matters a great deal for someone who is only trying the technique out.
How long each format takes
Time depends on how densely the design is beaded and on how used to the technique you already are. The figures below are a guide for an unhurried pace.
| Format | Approximate working time | What is needed after stitching |
|---|---|---|
| Magnet | 3–6 hours | mount on the acrylic base, apply the magnetic tape |
| Keyring | 4–8 hours | assemble the base with its fittings, attach the ring |
| Card | 4–10 hours | tidy the back, fold, write in it |
| Mini kit | 10–20 hours | a frame or a mount |
| Medium picture | 40–80 hours | stretching and framing at a workshop |
The table shows the main point: the gap between a magnet and a picture is not double, it is an order of magnitude. When a birthday is a week away, the choice is effectively made for you.
How to assemble a magnet on an acrylic base
Bead embroidery magnet kits contain, besides the art canvas with its printed design, Preciosa beads, needles and instructions, an acrylic base and magnetic tape — and those are what turn the embroidery into a finished magnet. The order of work is as follows.
- Secure the working thread on the back with two or three small stitches, without a large knot, and trim the tail short.
- Check the back: long floats and knots show as bumps once the canvas is stretched over the base. Trim what needs trimming now; later it will be too late.
- If the canvas has creased, press it from the back only, through a cloth, with a warm iron, avoiding the beaded areas. Never iron over the beads themselves.
- Place the acrylic base against the back and draw round it, leaving a 1–1.5 cm allowance on every side. Check that the design sits centrally — even a centimetre of offset is visible.
- Cut the canvas along the allowance. Trim the corners diagonally so that no extra bulk collects at the back.
- Stretch the canvas over the base, fold the allowance to the back and fix it. The neatest method is to first draw the allowance in with a running stitch all round, then secure it with double-sided tape or glue. There is no tape or glue in the kit — those come from home.
- Apply the magnetic tape: peel off the backing and lay one or two strips on the back, closer to the edges rather than in the centre. A magnet held at two points does not swing on a fridge door.
- Let the fixing set before you hang the piece up.
Three mistakes that most often spoil a magnet
- Too much glue. It seeps through the canvas as dark patches, and the affected area cannot be rescued. Apply glue in dots on the back, not in a continuous layer.
- Too small an allowance. Less than a centimetre and the canvas pulls off the edges as soon as you tension it.
- Magnetic tape in the centre. The piece rocks and rotates under its own weight. Two strips nearer the edges hold it straight.
How to assemble a keyring
A keyring differs from a magnet in two ways. First, it is handled every day, so the edge wears faster. Second, the finished keyring sits on fittings — a base and a ring; what exactly a given kit contains is stated on its own product page, because the construction differs from kit to kit.
- Secure the thread and trim the back as short as possible: on a keyring the back is often closed with a rigid cover, and every extra millimetre stops it seating properly.
- Cut the canvas to the outline of the base with a small allowance.
- Stretch the embroidery over the base and close the back with whatever the kit's construction provides.
- Assemble the base and fit the ring through the hole, where the construction provides for one. Open the ring with a fingernail or fine pliers rather than pulling it apart.
One practical tip: on a keyring, avoid long thread floats on the back and finish the edge more densely than you would on a magnet. A keyring rubs against keys, pockets and rucksack linings, and the edge is exactly where the weak point shows up.
An embroidered card: how to finish it
A card is a format in which the embroidery acts as the cover while the object remains a card: you write in it and give it away. You either stitch on the blank itself or on canvas that is then set into the card's window, depending on the kit.
- The back must be flat. A card folds, and any knot will stop it closing evenly.
- Write with a pen that does not bleed on heavy paper, and do it before putting the card into its envelope, not after.
- Choose an envelope with room to spare in thickness: an embroidered card is thicker than a printed one and only just fits an ordinary envelope.
- If the card is going by post, use a heavy envelope or a padded one. Beads press through thin paper and the embroidery can be scuffed in sorting.
A separate variety is the envelope-card for microbead embroidery. Its detail is finer and it needs good light, so it is not the best choice for a first attempt.
Who they suit as a gift
The magnet is the most versatile of the three: it finds a place in any home, needs no wall space and works as a thank-you for a teacher, a souvenir for a colleague or a small gift that puts nobody under obligation. Keyrings are more often given to teenagers and to people who carry keys in a pocket or on a rucksack. A card works where there is a specific date and what is wanted is less "something for the wall" than words that will stay.
There is a fourth option — giving not the finished object but the kit itself, to someone who has long wanted to try. The formats in this article suit that too: the small scale is not intimidating, and a first project does not drag on for months. They are gathered in the bead embroidery magnet kits, keyring kits and embroidery cards sections.
Frequently asked questions
Does a magnet or a keyring need framing?
No. These formats finish themselves: magnet kits include an acrylic base and magnetic tape, and a keyring is assembled on its own base with a ring. Framing and stretching are for pictures, not for small formats.
Can bead embroidery be ironed?
Only from the back, through a cloth, with a warm iron, keeping away from the beaded areas. Ironing directly over beads can damage them and melt the thread they are sewn with.
What should I use to glue the canvas to the acrylic base?
Double-sided tape or a clear glue that does not seep through fabric, applied in dots on the back. Neither is in the kit — they come from home. Draw the allowance in with a running stitch first and you will need very little glue.
How long does a magnet kit take?
Roughly 3–6 hours of unhurried work, that is one or two evenings. A keyring takes a little longer, a card up to ten hours depending on how densely it is beaded.
Does the magnetic tape hold through the canvas?
Yes — the tape is stuck to the back of the acrylic base, not through the fabric, so only the thickness of the tape sits between magnet and metal. Two strips nearer the edges hold the piece level.
Can an embroidered card be sent by post?
It can, but in a heavy or padded envelope. Beads press through thin paper, and the embroidery can be scuffed during sorting.